Mastering the 3-Point Arc in AutoCAD: A Beginner’s Guide
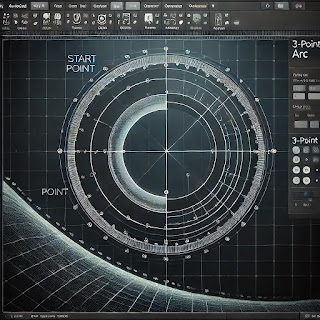
In AutoCAD, drawing arcs is a fundamental task, especially when designing complex shapes or making smooth transitions between lines. One of the most commonly used methods for creating arcs is the 3-Point Arc. As the name suggests, this method allows you to create an arc by specifying three distinct points: the start point, a point along the arc, and the endpoint. It’s a straightforward tool, yet incredibly powerful for various design applications.
In this post, we will guide you through the process of using the 3-point arc in AutoCAD and discuss how this tool can benefit your CAD projects.
What is the 3-Point Arc in AutoCAD?
A 3-point arc is a segment of a circle that is defined by three points. Unlike a full circle, an arc is just a portion of the curve, and using three points to define the arc gives you precise control over the shape and size of the arc. The three points you select in AutoCAD dictate how the arc curves, making this tool highly flexible.
How to Draw a 3-Point Arc in AutoCAD
Drawing a 3-point arc in AutoCAD is simple, and it's a feature that's accessible from the Arc command. Here's how to do it step by step:
Start the Arc Command:
- On the Home tab, under the Draw panel, find and click the Arc tool. Alternatively, you can type
ARCinto the command line and press Enter.
- On the Home tab, under the Draw panel, find and click the Arc tool. Alternatively, you can type
Select the 3-Point Arc Option:
- Once the Arc command is active, you’ll be prompted to choose the method to create the arc. In this case, choose the 3-Point option. You can select this option from the dynamic input or by typing
3Pand pressing Enter.
- Once the Arc command is active, you’ll be prompted to choose the method to create the arc. In this case, choose the 3-Point option. You can select this option from the dynamic input or by typing
Specify the Start Point:
- Click on your drawing to specify the first point. This will be the start of the arc.
Specify a Point on the Arc:
- Next, pick a point somewhere along the path where the arc should pass. This point defines how the arc curves.
Specify the Endpoint:
- Lastly, click the point where you want the arc to end. AutoCAD will automatically create the arc that passes through these three points.
Benefits of Using the 3-Point Arc
The 3-point arc is a simple yet powerful tool in AutoCAD. Here are a few reasons why it’s so effective:
Control and Flexibility: Unlike a simple circle or a two-point arc, the 3-point arc gives you more control over the shape and curvature by allowing you to define a midpoint. This makes it easier to draw smooth, controlled arcs that fit into complex designs.
Precise Design: The 3-point arc allows you to precisely connect objects or align curves in your drawings. Whether you’re working on architectural elements, mechanical parts, or landscaping designs, the 3-point arc offers greater flexibility.
Quick and Easy: For beginners, the 3-point arc is one of the easiest methods for drawing curves. It doesn’t require advanced settings or complex procedures, making it ideal for fast, efficient work.
When to Use the 3-Point Arc in AutoCAD
The 3-point arc is useful in many scenarios. Here are a few examples where this tool is particularly handy:
- Architecture: Creating curved windows, doorways, or archways often requires precise arcs. The 3-point arc is perfect for this.
- Mechanical Design: When designing gears, cams, or other mechanical components, you might need to generate curves that connect specific points with precision.
- Landscaping and Road Layouts: If you’re designing a layout for a park or planning a road network, using arcs for smooth transitions and curves is essential.
Tips for Mastering the 3-Point Arc
To get the most out of the 3-point arc in AutoCAD, consider these tips:
Use Object Snaps (Osnaps): Object snaps help ensure that the points you select for the arc are accurate, especially when connecting arcs to other objects. Use snaps like endpoint, midpoint, and intersection to enhance your precision.
Combine with Other Tools: The 3-point arc works great alongside other drawing tools. For example, you can combine it with the Trim or Extend commands to adjust the length of arcs or connect them with other shapes.
Experiment with Different Point Placements: Depending on where you place the second point on the arc, you can drastically change the curvature. Experiment with different placements to see how it affects the arc shape.
Common Mistakes to Avoid
While the 3-point arc is simple, there are a few common mistakes beginners should avoid:
Inaccurate Point Placement: Make sure your points are precise. Using object snaps can help prevent arcs from being misaligned with other objects.
Choosing Points Too Close Together: When the three points are too close, the arc may become distorted or not appear as smooth. Make sure to space your points properly to create a well-formed arc.
Conclusion
The 3-point arc in AutoCAD is an essential tool for any designer or drafter. It allows you to create precise, controlled curves that are vital for many types of design work. By understanding how to use this simple yet versatile tool, you can enhance your workflow and bring more accuracy to your CAD projects.
Whether you're working on an architectural design, mechanical part, or landscape layout, the 3-point arc is a valuable asset in your AutoCAD toolkit. Practice using it in different scenarios and see how it can improve your design process!
Feel free to experiment with the 3-point arc in your next AutoCAD project and explore how different point placements can change the outcome. The more you use it, the more intuitive it will become!


Comments
Post a Comment