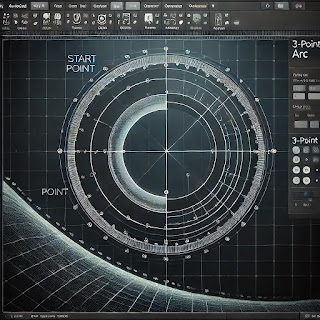
How to Draw a Start, Center, End Arc in AutoCAD
Here’s a step-by-step guide to drawing an arc using the Start, Center, End method in AutoCAD:
Start the Arc Command:
- On the Home tab, under the Draw panel, click the Arc tool, or simply type
ARCin the command line and press Enter.
- On the Home tab, under the Draw panel, click the Arc tool, or simply type
Choose the Start, Center, End Option:
- Once the Arc command is activated, select the Start, Center, End option from the dynamic input or by typing
SCEin the command line and pressing Enter.
- Once the Arc command is activated, select the Start, Center, End option from the dynamic input or by typing
Specify the Start Point:
- Click on the drawing to place the start point of your arc. This will be where the arc begins.
Specify the Center Point:
- After selecting the start point, click to specify the center point of the arc. This point represents the center of the circle from which the arc is derived.
Specify the End Point:
- Finally, click to place the endpoint of the arc. AutoCAD will then draw the arc segment between the start and end points, based on the circle’s center.
Key Benefits of Using the Start, Center, End Arc
The Start, Center, End method for creating arcs offers several advantages, especially when precision is required:
Precision Control: By specifying the center point, you can control the radius of the arc precisely, making this method ideal for designs where exact dimensions matter.
Easy Alignment: If your design requires the arc to be aligned with other circular elements, defining the center point ensures that the arc shares the same radius and curvature with other parts of the design.
Useful for Circular Parts: This method is particularly useful when designing mechanical components that involve circular or rotational geometry, such as gears, pulleys, or pipes.
Practical Applications of the Start, Center, End Arc
The Start, Center, End method is particularly useful in various fields, including:
Mechanical Design: When creating parts that are defined by circular shapes or rotational symmetry, such as gears or wheels, using the Start, Center, End arc ensures accuracy.
Architectural Design: In architecture, this method helps to create precise arcs for structural components like domes, curved windows, and other circular features.
Civil Engineering: This method is also useful in road layout and infrastructure design where curves with known radii are needed.
Tips for Working with Start, Center, End Arcs in AutoCAD
Use Object Snaps (Osnaps): To ensure accuracy when placing the center and end points of your arc, use object snaps like center, endpoint, and midpoint to snap to existing geometry.
Adjusting the Arc After Creation: Once an arc is drawn, you can still modify its shape by using grip points. Drag the start, center, or endpoint to refine the arc’s position or curvature.
Work with Layers: Organize your drawing by using layers to manage different types of geometry. For example, place all arcs related to a specific component or section on one layer for better visibility and control.
Common Mistakes to Avoid
Inaccurate Center Point: If the center point is placed incorrectly, the radius of your arc will be wrong, which can lead to inaccuracies in your design. Double-check the location of your center point before finalizing the arc.
Misaligned Arcs: If your design requires arcs to be aligned with existing geometry, ensure that you are using object snaps to accurately connect the start or end points to the desired reference points.
Overcomplicating Simple Arcs: While the Start, Center, End method provides precise control, it may not always be necessary for simple arcs. If the radius or center point is not critical, consider using other arc creation methods like Start, End, Direction or 3-Point for faster results.
Conclusion
The Start, Center, End method for drawing arcs in AutoCAD is a powerful tool when precision and control are required in your design. By specifying the center point, you can accurately define the arc’s radius, making it perfect for mechanical, architectural, or civil engineering projects.
This method ensures that your arcs are not only smooth and precise but also aligned with other circular elements in your design. Whether you’re working on a detailed mechanical part or creating an architectural feature, mastering the Start, Center, End arc will enhance the accuracy and quality of your designs.
Practice using this method in your next AutoCAD project to see how it can improve your workflow and the precision of your designs!


Comments
Post a Comment